Login


Wolfe Publishing Group
    Menu

    Light Gunsmithing

    Final Work on the Model 52C Winchester

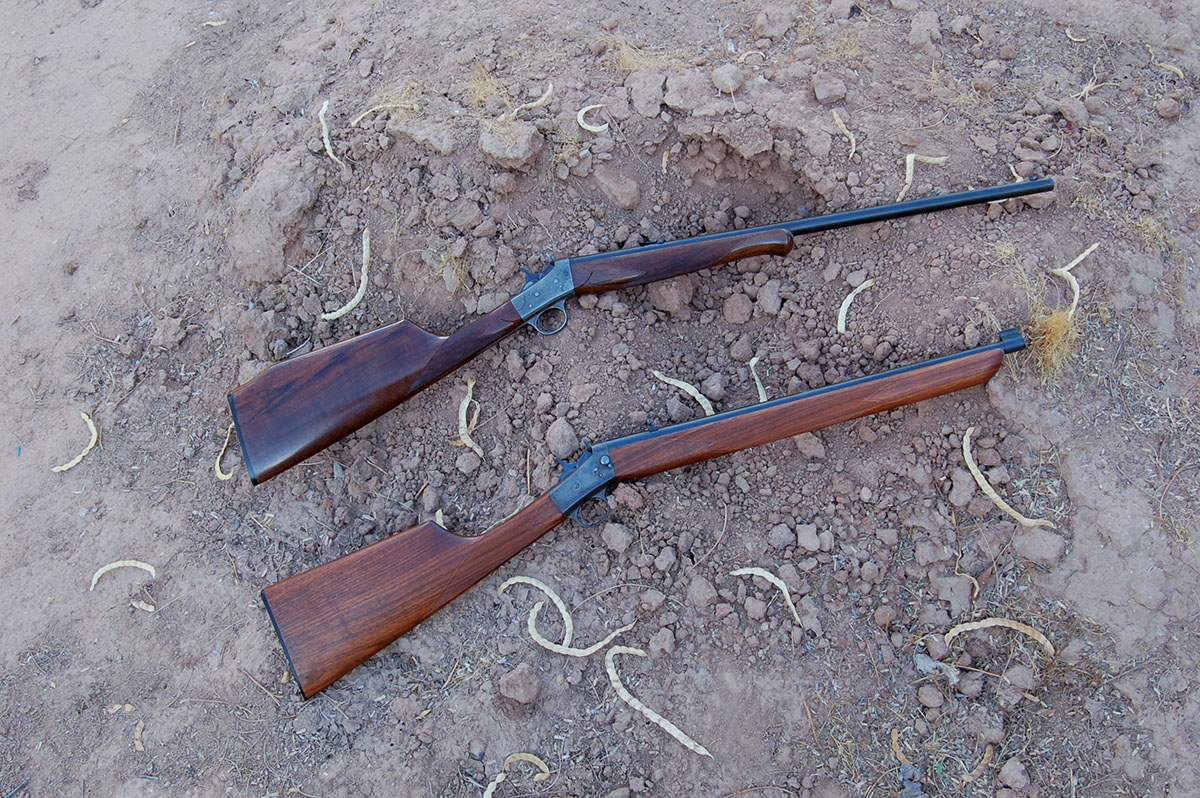
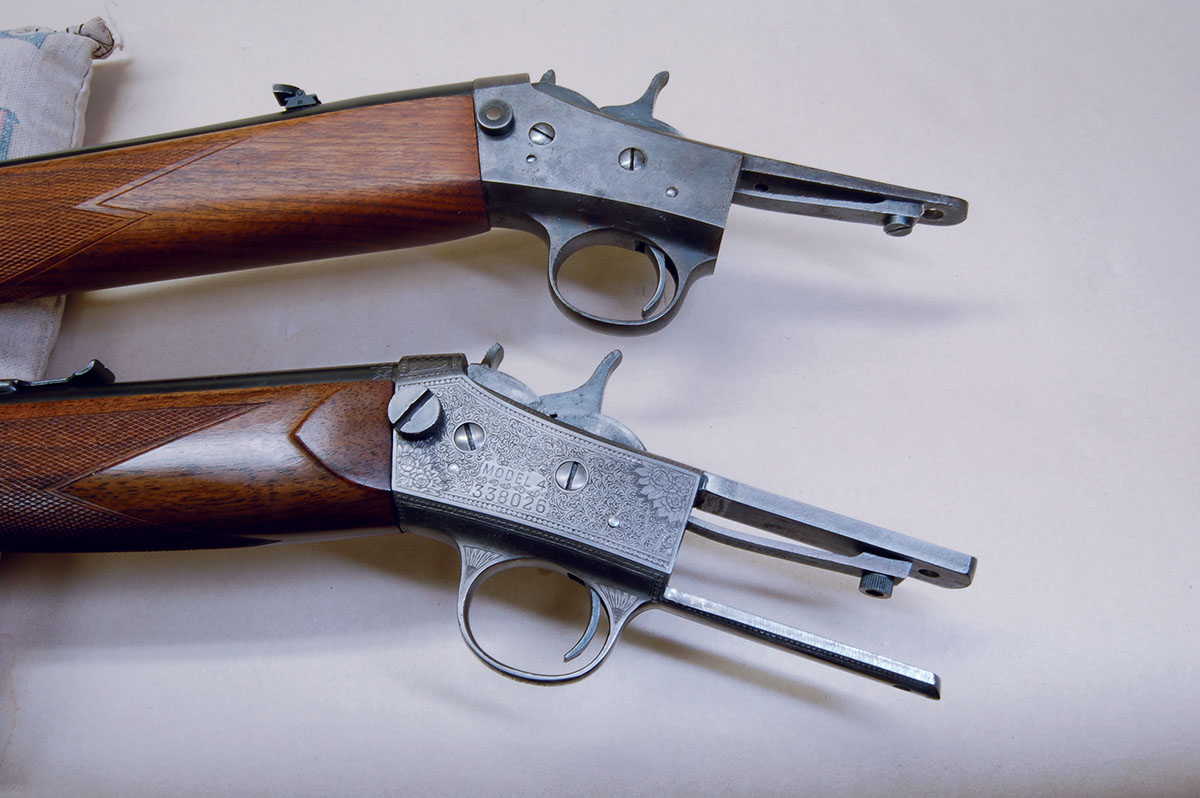
    Big centerfire rolling block (top) is basically scaled down to make the No. 4 (bottom).
    Big centerfire rolling block (top) is basically scaled down to make the No. 4 (bottom).
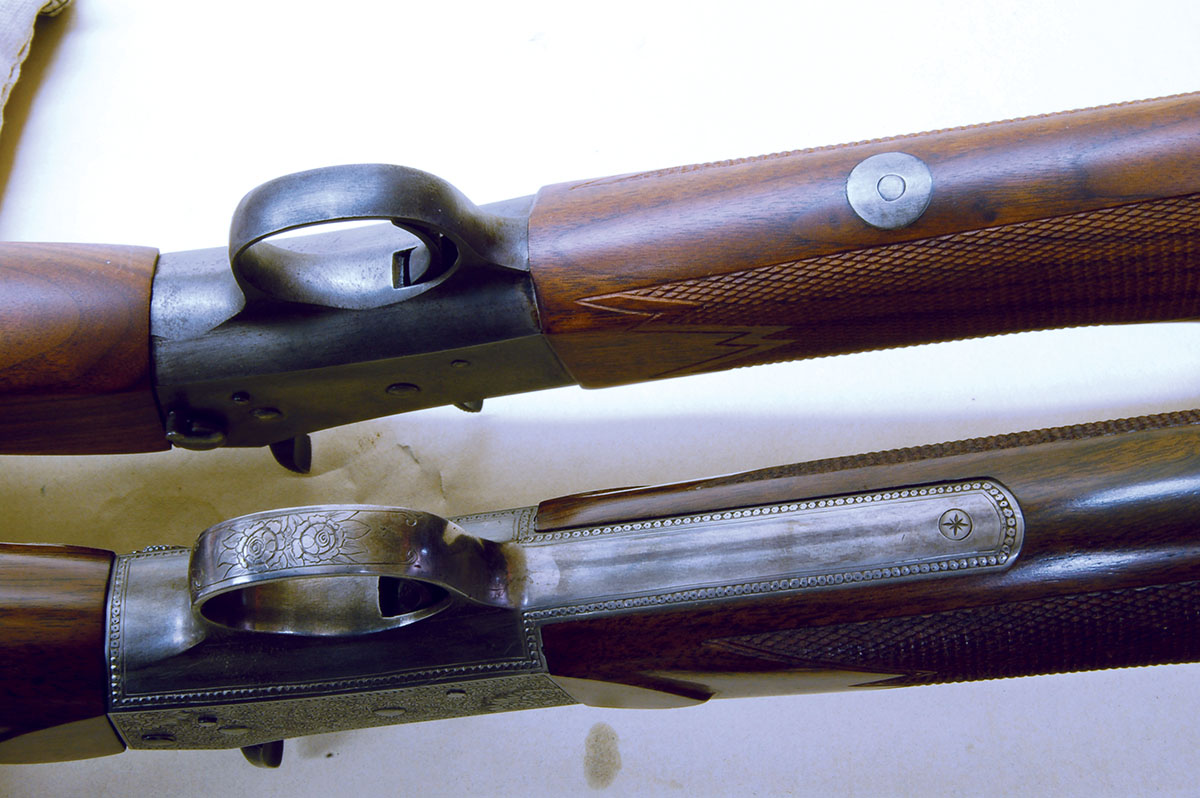
    Underside view of the No. 4 without lower tang (top) and welded­ on lower tang (bottom).
    Underside view of the No. 4 without lower tang (top) and welded­ on lower tang (bottom).
    Riflefolk who find the category of pre-World War II 22 rimfire rifles loosely termed boys’ rifles to be irresistible are constantly searching for another unique example. Of course, when one is found, the new owner wants to shoot it, at least a little. Therein lies a problem.
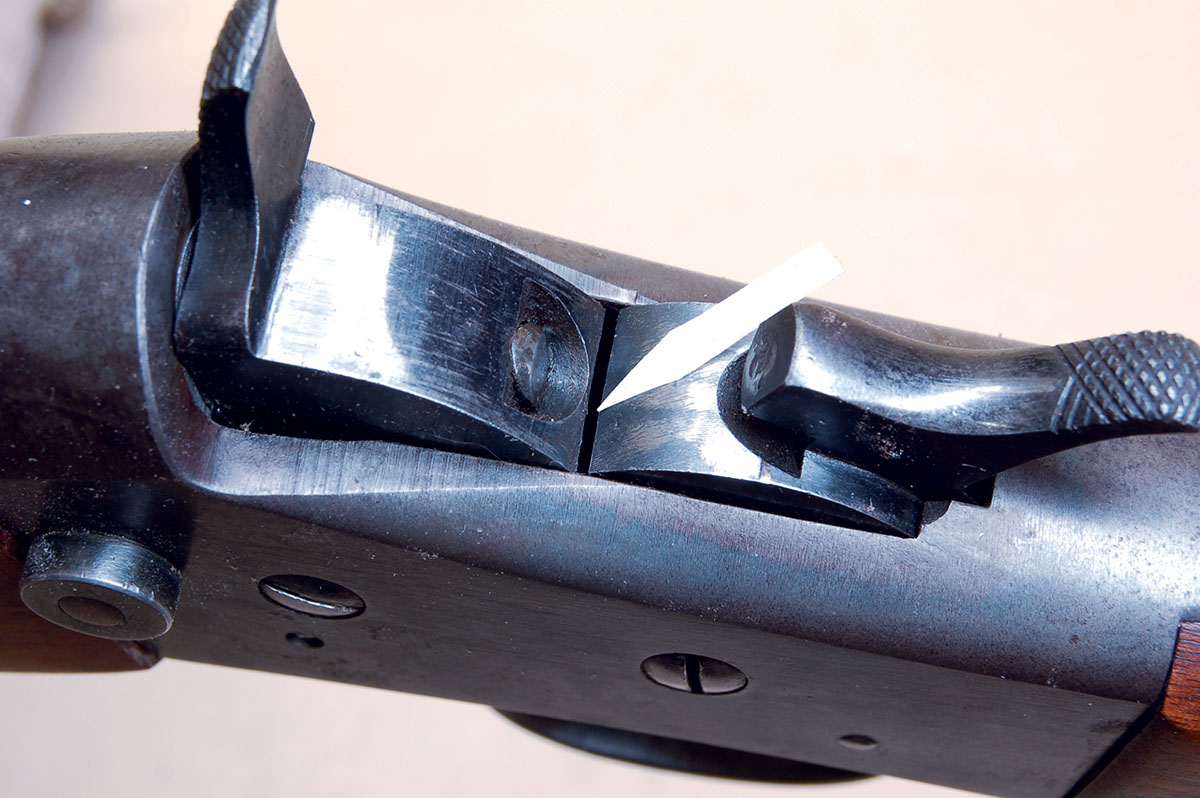
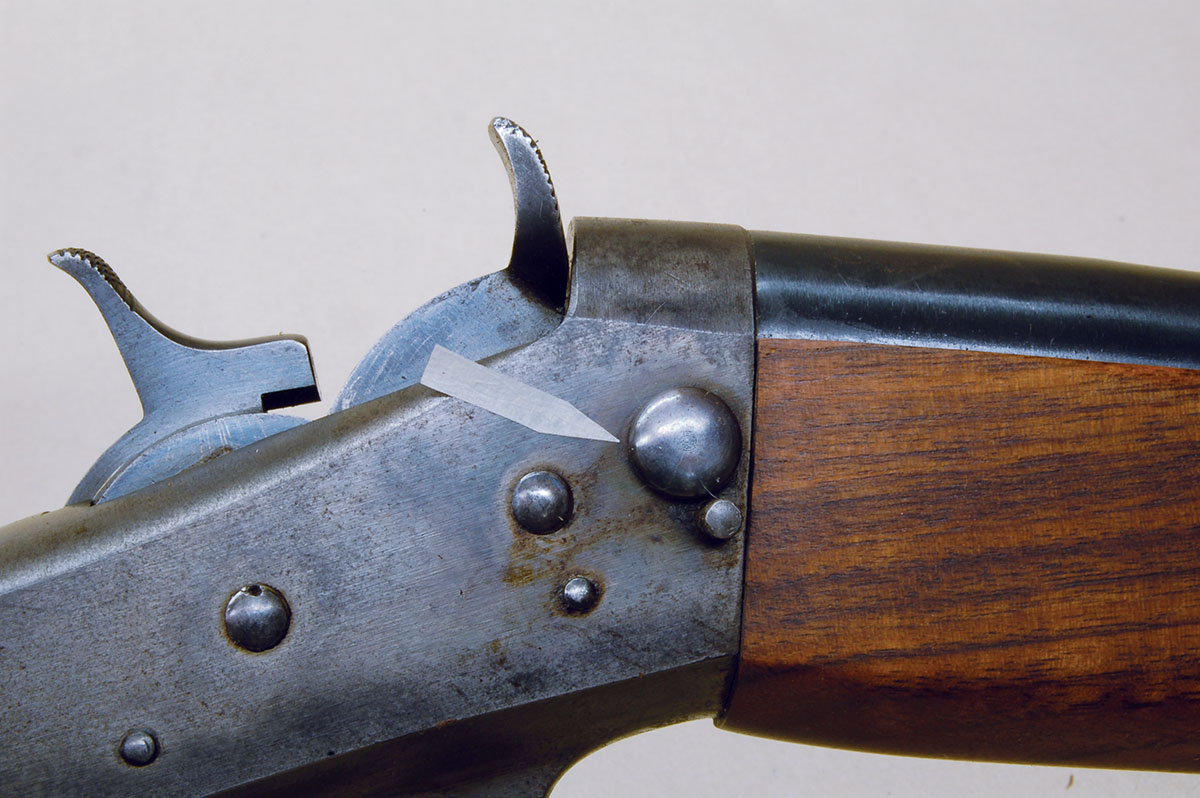
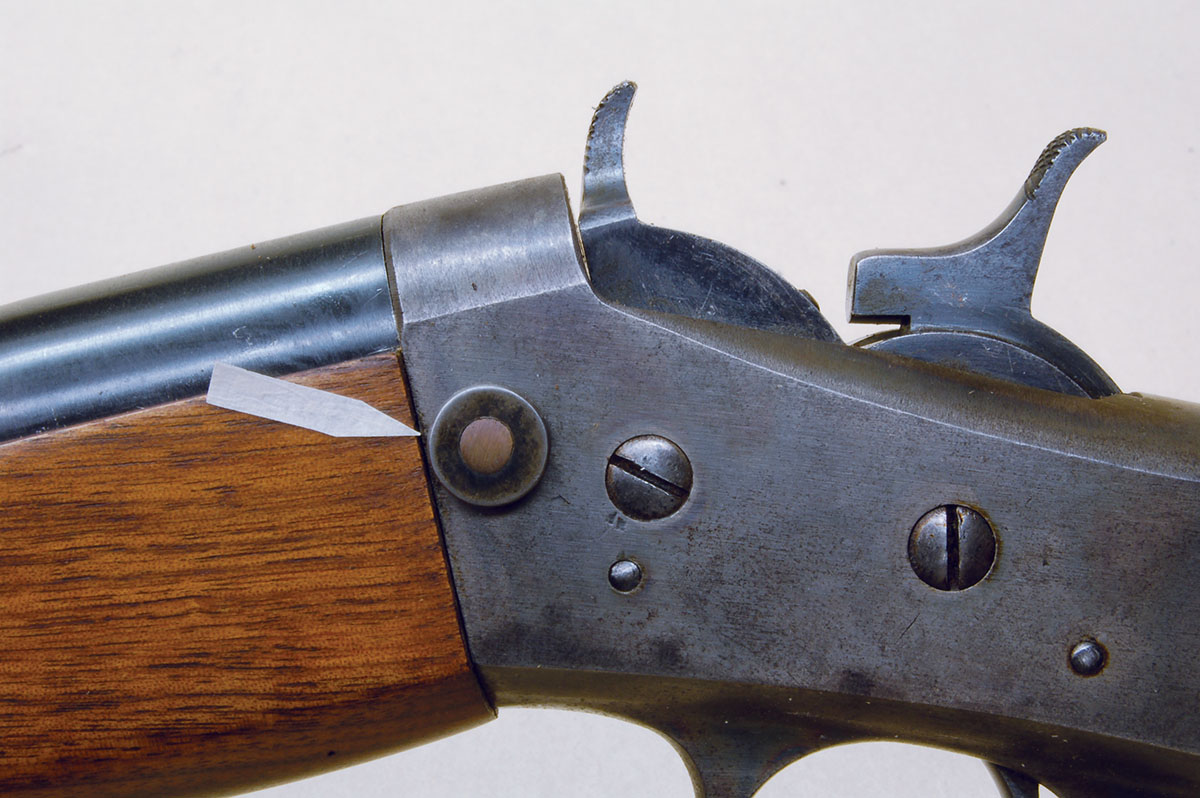
    Gap (arrow) between the rear of the breechblock and front of the hammer when cocked indicates no sear wear.
    Gap (arrow) between the rear of the breechblock and front of the hammer when cocked indicates no sear wear.

    A low selling price was always the main feature of these little rifles. Thus, costs were minimized to the extreme by ingeniously simple designs. However, this desire for ever simpler and cheaper manufacturing led to safety concerns that today would cause a company lawyer to abandon his practice and take up dog grooming.

    Early 22 rimfire ammunition had cases drawn from copper. Copper is soft. Case rims often blew out at the point of impact with the firing pin tip. Some of the old single shots (that were not bolt actions) had chambers without rim recesses; the entire rim was exposed between the rear of the barrel and the breech face. Cost was the reason. It is far faster and cheaper to make a straight-sided reamer than one with a step up at the rear to cut a rim recess. While rim blow-outs are rare today in brass cased ammunition, they still occur. When shooting the old rifles eye protection is mandatory.
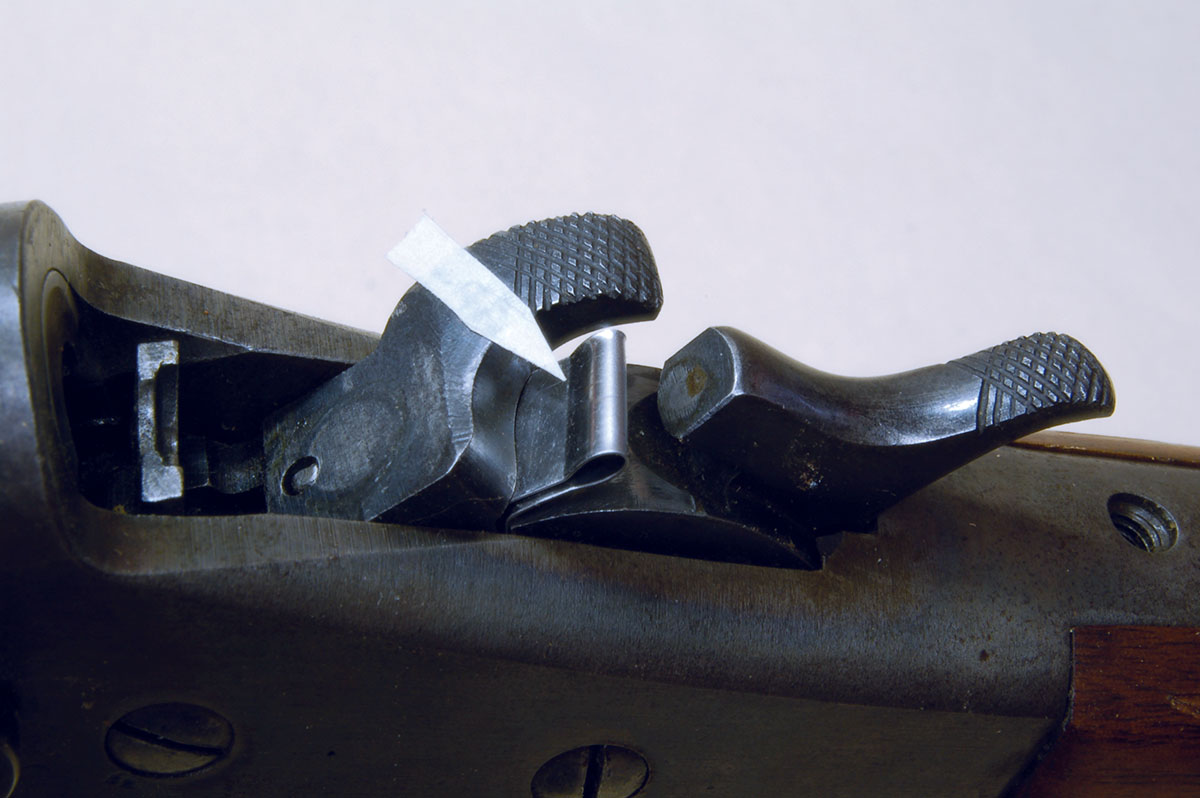
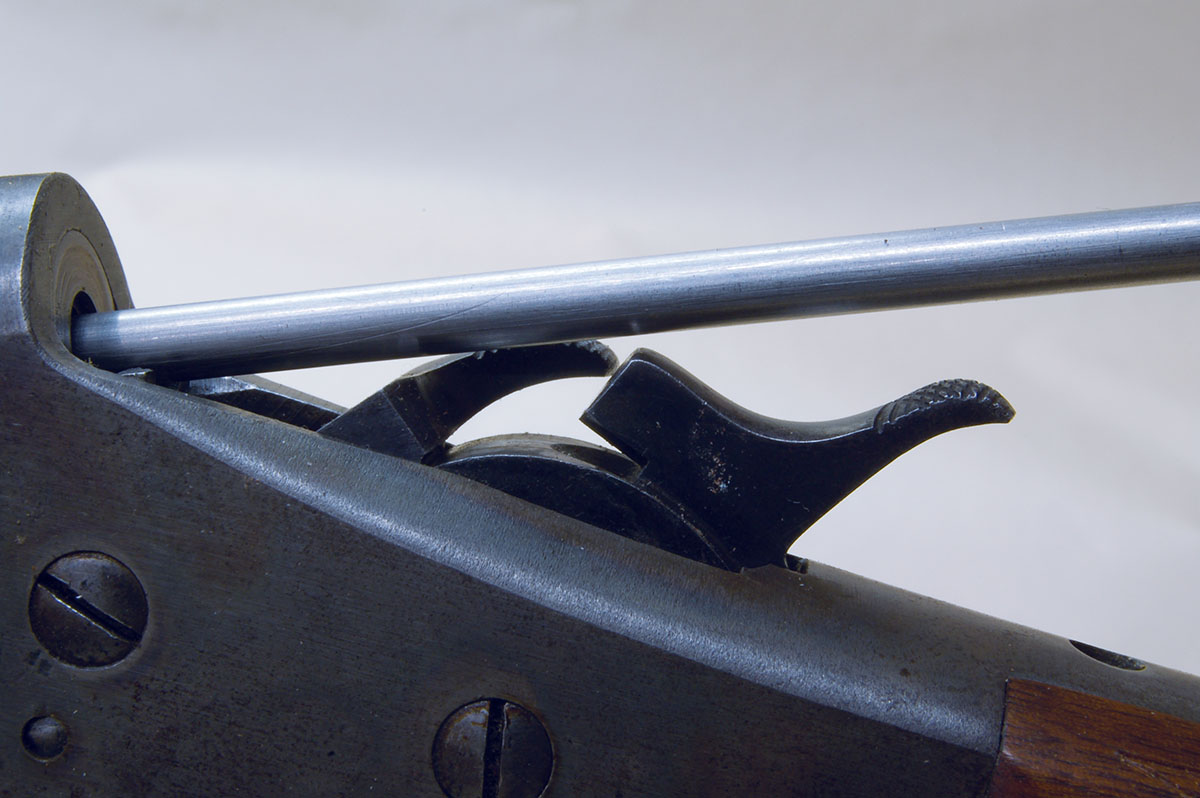
    If the cleaning rod does rub the hammer nose a bit, a shim (arrow) between the breechblock and the hammer will push the hammer back far enough to miss the rod.
    If the cleaning rod does rub the hammer nose a bit, a shim (arrow) between the breechblock and the hammer will push the hammer back far enough to miss the rod.
    There is also another similar concern. If chambers that do have a rim recess experience a rim failure, the hot gas can›t blow out the side, so it takes the path of least resistance ­ down the firing pinhole in the breechblock. The firing pin in virtually every one of these guns is straight-sided, held in place by a cross-pin in the breechblock. Hot gas is directed straight back into the shooter’s face, blocked only by the hammer. No one seemed concerned at the time. This has happened to me three or four times but having worn glasses since grade school, no harm was done.
    If no sear wear is present, the cleaning rod should miss the hammer nose by the amount shown.
    If no sear wear is present, the cleaning rod should miss the hammer nose by the amount shown.

    It is also sometimes written that boys’ rifles are dangerous to fire with modern high-velocity cartridges. The inference is that these rounds are loaded to a higher pressure than others.

    However, my latest data shows all long rifle cartridges (standard velocity, match, high velocity and hyper velocity) have the same Maximum Average Pressure (MAP) of 24,000 psi. This figure is not inconsequential as the MAP for the 38 Special is 17,000 psi and 45 ACP is 21,000 psi. Ammunition companies don’t have to load up to the limit. Standard velocity and some match ammo are probably lower since it doesn’t function in many autoloaders. Standard velocity rounds will often be the most accurate, anyway.
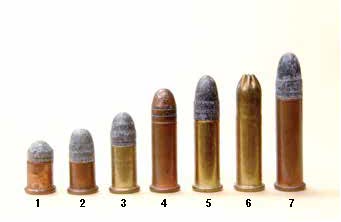
    Cartridges shot in 22 rimfire boys’ rifles include: (1)BB Cap, (2) CB Cap, (3)22 Short, (4) 22 Long, (5) 22 Long Rifle, (6) LR Shot, (7) and sometimes Extra Long.
    Cartridges shot in 22 rimfire boys’ rifles include: (1)BB Cap, (2) CB Cap, (3)22 Short, (4) 22 Long, (5) 22 Long Rifle, (6) LR Shot, (7) and sometimes Extra Long.
    Moving on to rifles next up is probably the highest quality of any of the true boys’ rifles. The guns are still sought after for the action to build custom rifles. Today we call it the Remington No. 4 rolling block, but the maker referred to it as the Remington System. The receiver is like the centerfire military rifles except scaled down to fit .22 and .32  caliber rimfires. The receiver and major parts are forged steel and case-hardened. Over 350,000 were made from 1890 to 1932.

    Unfortunately, the No. 4 is not without its faults. The first is most important when buying one of the rifles. Pull the hammer back to full cock with the breechblock closed. There should be a gap of about .035-inch between the rear of the breechblock and the front of the hammer. This gives enough
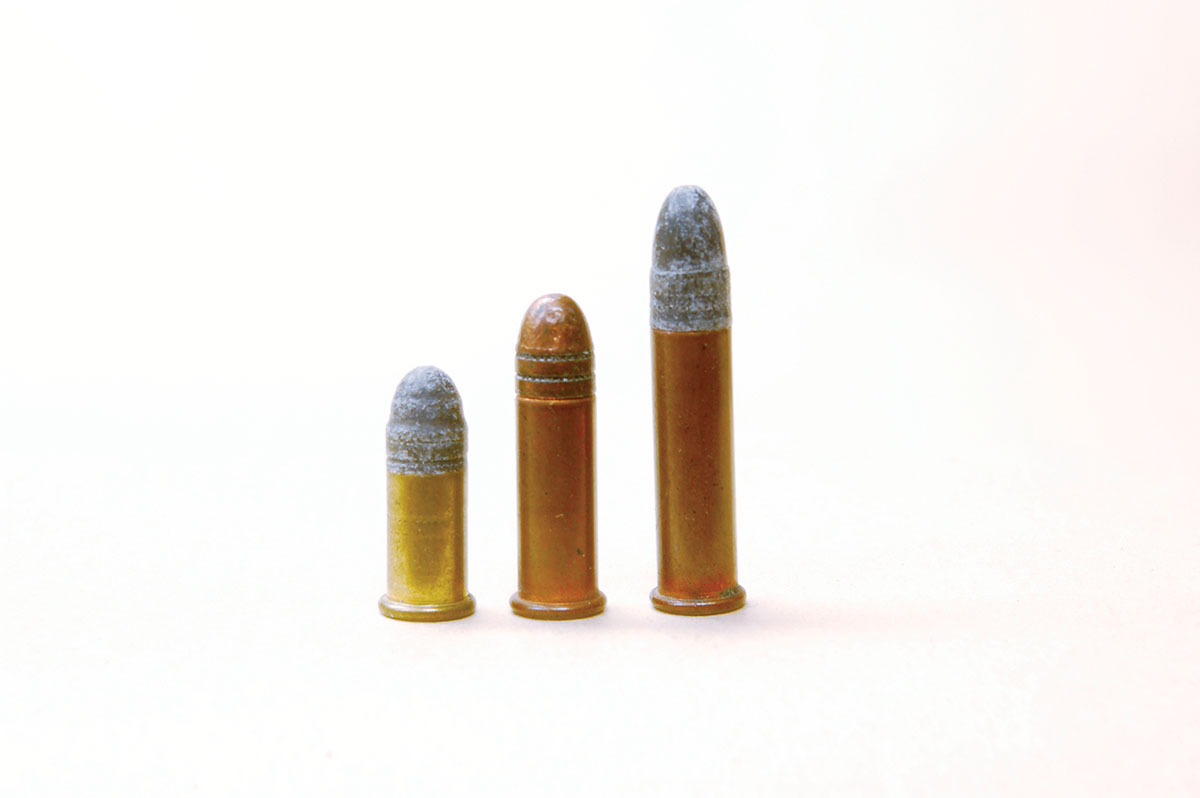
    From left, Short, Long and Extra Long cartridges show why the shorter rounds didn’t shoot well in an Extra Long chamber.
    From left, Short, Long and Extra Long cartridges show why the shorter rounds didn’t shoot well in an Extra Long chamber.
    clearance for the breechblock to roll open and expose the chamber for loading. If the space is not present the breechblock will move stiffly or even hang up as more force is needed for it to push the hammer back out of the way. The cause for this condition is wear on the sear nose, almost always caused by some “expert” grinding on it to improve trigger pull.

    The fix is a new trigger since the trigger and sear are one piece. Given that the last No. 4 was made over ninety years ago, good luck with that. Such guns are best left for someone else to own.
    Head of solid takedown pin made to replace factory lever-type.
    Head of solid takedown pin made to replace factory lever-type.
    A second item is also a major annoyance. About sixty percent of these rifles were takedowns of two types. Both used a tapered pin that fits a tapered groove cut into the bottom of the barrel. This pin had a flat milled on it that, when aligned with the barrel shank, allowed the barrel to slide out of the receiver. The joint became loose over time.

    When a joint won’t tighten up it’s best to turn a new tapered pin on the lathe and cut a few threads to protrude from the receiver on the small end. Cut no takedown flat on the pin. Make a round nut with a screwdriver slot to fit the threads, tap in the pin, and pull the nut tight. Never touch it again!

    The only reason to use a takedown feature today is because a cleaning rod contacts the hammer nose when cleaning from the breech. This will not happen if the gap between the hammer and breechblock mentioned a few paragraphs back exists. If not quite enough, pull the hammer back past full cock and insert a shim (See photo above), fit, and the breechblock to hold it there. It’s not very elegant, but it prevents disturbing the takedown joint or cleaning from the muzzle.
    Unaltered Rem. No. 4 with no lower tang (top) and with added lower tang (bottom). Side view without stocks.
    Unaltered Rem. No. 4 with no lower tang (top) and with added lower tang (bottom). Side view without stocks.

    Mainsprings are simple flat springs that should not break. A broken spring would probably indicate excessive dry firing so look carefully for abuse. A damaged firing pin is also easily replaced.
    Opposite side of action showing round nut that pulls solid pin tight. It has a locking compound on it and won’t come apart for the photo!
    Opposite side of action showing round nut that pulls solid pin tight. It has a locking compound on it and won’t come apart for the photo!
    There remains one screaming defect affecting the Rem. No. 4 rifle: It has only one rear tang! Whoever approved this design must have never seen a human child, especially young boys for whom these rifles were purchased. They are clumsy and run everywhere. They also fall down a lot. If carrying a rifle, the muzzle hits the ground first followed by the toe of the stock. The kid more or less lands on top, bending the tang upward and breaking the stock.

    Receivers are forged steel so the tang can usually be bent back into place without breaking -- once! Then the metal cracks at the bend. Repairs have been seen in the form of gobs of brazing or silver solder alloy on the tang and even attempts with a common arc welder that melted much of the tang.

    Proper repair is really quite simple, using a TIG welder or even a small wire welder with inert gas shielding.

    Almost no gunshops have such equipment, but custom ‘smiths do. If repairing a broken tang, I would definitely have a lower tang welded on since a new stock will be required anyway. This makes the stock/receiver joint feel more solid. Finding someone to do the welding should not be difficult.

    The gun in the photos was purchased as a well-worn rifle with a tang repaired by brazing, a broken stock and loose takedown joint. The top tang was replaced, a bottom tang was welded on, and a loose takedown joint was repaired using a solid pin. The rifle was then restocked and engraved. One does not mind spending a bit on an action like the Rem. No. 4. The same is true of the other No. 4 shown, which is an excellent example of 1960s custom work. It also had a takedown joint that required repair.
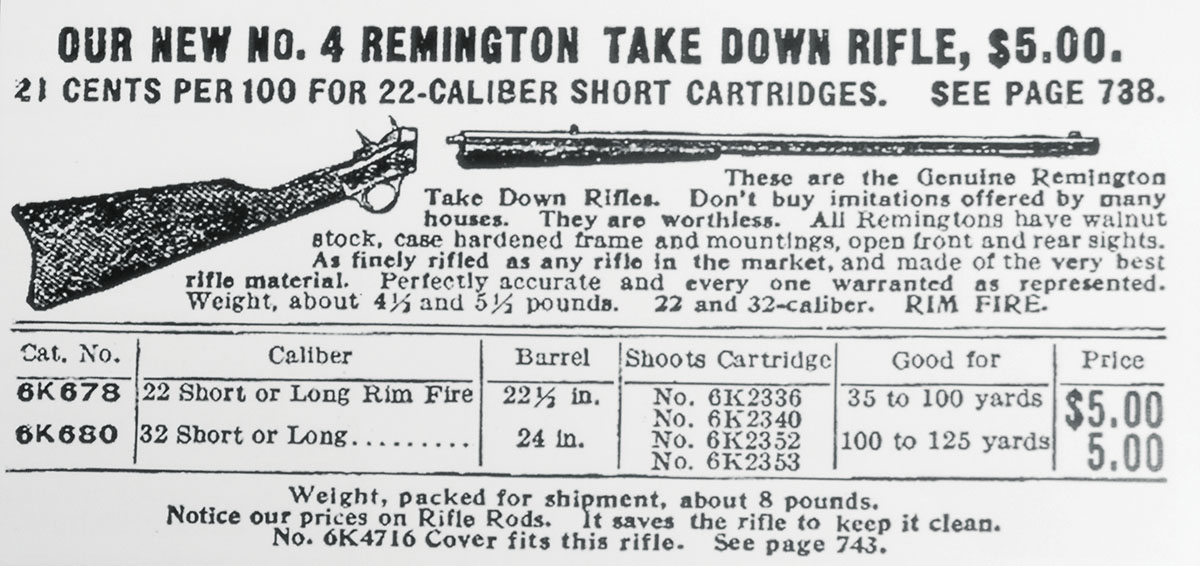
    Early ad for Rem. No. 4 takedown rifle.
    Early ad for Rem. No. 4 takedown rifle.
    Today, kids have moved on from the little rifles to aluminum autoloaders featuring composite sights, Picatinny rails, M-LOK slots, and plastic stocks adjustable using metric wrenches. Nevertheless, there are still boys shooting boys’ rifles – the boys are just a lot older now.

    Wolfe Publishing Group