Login


Wolfe Publishing Group
    Menu

    Light Gunsmithing

    Making Reproduction Grip Caps and Buttplates

    Supplies for producing grip caps included Brownells Acraglas and hardener, baby powder, thinner, modeling clay, black dye and grip caps to copy.
    Supplies for producing grip caps included Brownells Acraglas and hardener, baby powder, thinner, modeling clay, black dye and grip caps to copy.
    Refinishing stocks is probably the most common home gunsmithing operation. Many gunsmiths have also made a reputation over the years as being particularly good at it. Used rifles and especially shotguns, can often be bought at very reasonable prices if the stock is well-worn or scratched. Refinishing or simply “reviving” the finish, as explained in this column in Rifle No. 318 (September – October 2021) can make the gun look markedly better and raise its value too.

    The grip cap to be copied is attached to a short piece of dowel (handle) so it can be removed from the clay when the mould is made.
    The grip cap to be copied is attached to a short piece of dowel (handle) so it can be removed from the clay when the mould is made.
    The grip cap is pushed into clay about .50 inch deeper than the cap to allow for the settling of the epoxy after pouring.
    The grip cap is pushed into clay about .50 inch deeper than the cap to allow for the settling of the epoxy after pouring.
    Understand that I am talking about stocks made from a material called wood. It has beautiful undulating grain patterns caused by natural minerals in the soil (runoff from parking lots won’t do it). Wood comes from really big plants called trees. They once stood where the shopping center, race track and soccer field now serve the needs of society. Wood is far different than stocks today, which are mainly made from the residue of squashed weeds, bugs and a dinosaur or two, long before there were even government bureaucrats. This modern product is then often colored to look like it was dipped in mud or pond scum. At least there are no battery compartments or LEDs. Not yet.

    When real wood stocks are refinished, the metal is often reblued as well. The work is now done, right? Not necessarily. There is nothing that takes away from an otherwise good-looking job than a cracked, broken or missing grip cap or buttplate. Original replacements are seldom available and used parts companies know nothing about proper caps or buttplates. What to do?

    This is a close-up of the mould cavity. The details should be perfect.
    This is a close-up of the mould cavity. The details should be perfect.
    For buttplates, a dealer who installs recoil pads may have something in his box of “cut-offs,” the rear of the stock with buttplate that is removed to make room for the recoil pad. Or a new half-inch rifle pad can be installed that looks better than a broken buttplate and grip cap sets for double shotguns like Remington and Parker Brothers, but that does no good if an old Ithaca, Stevens or H&R grip cap is needed.

    The rear of the casting is easily flattened by rubbing on a sanding disc. No power is used.
    The rear of the casting is easily flattened by rubbing on a sanding disc. No power is used.
    Fortunately, it is possible to produce an unlimited supply of these parts to use as replacements and additions to refinished stocks that formerly had no grip cap or inclusions on newly-made stocks. Of course, an undamaged part is needed for a pattern. Also, buttplates must be for stocks that are flat at the rear, not slightly concave, reminiscent of early steel rifle-style buttplates. This should not be much of a problem since gun folks generally own more than one firearm. Chances are – what is needed lives in your gun safe or one of a friends.
    With the grip cap held in a simple jig, a rod of screw head diameter is used to perfectly locate the screw hole.
    With the grip cap held in a simple jig, a rod of screw head diameter is used to perfectly locate the screw hole.

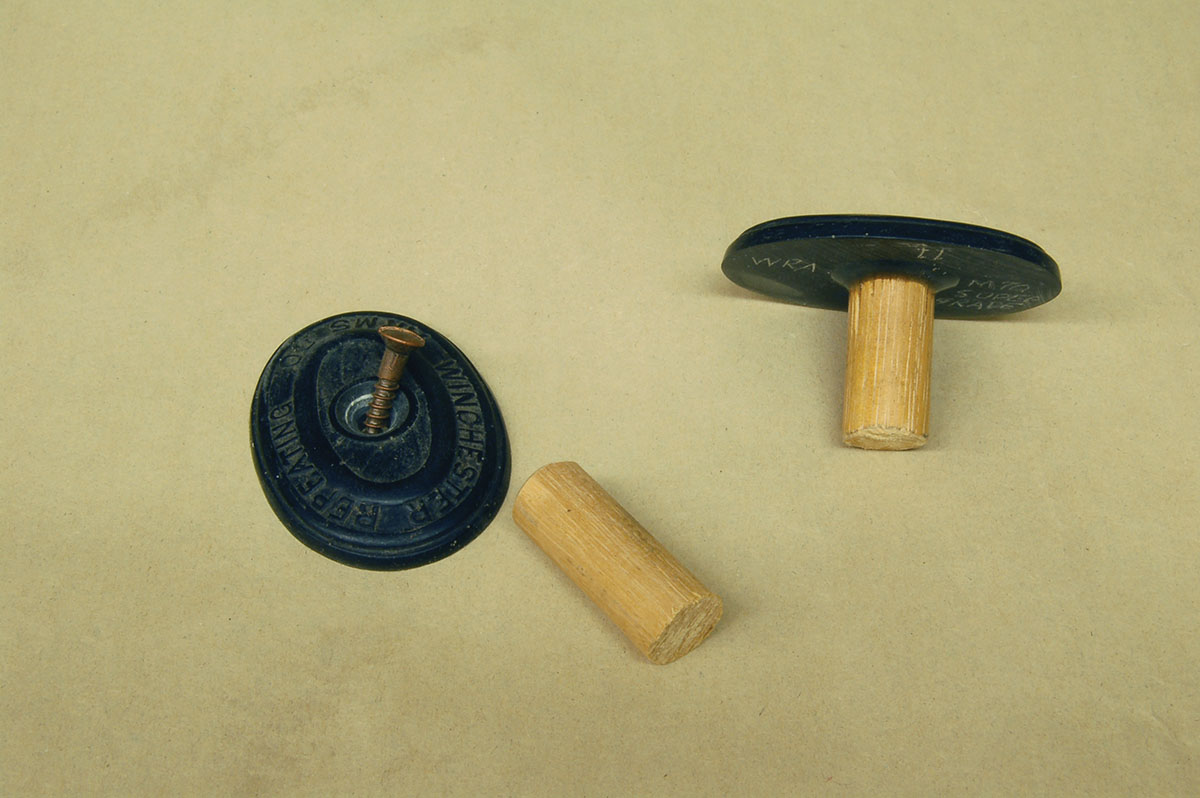
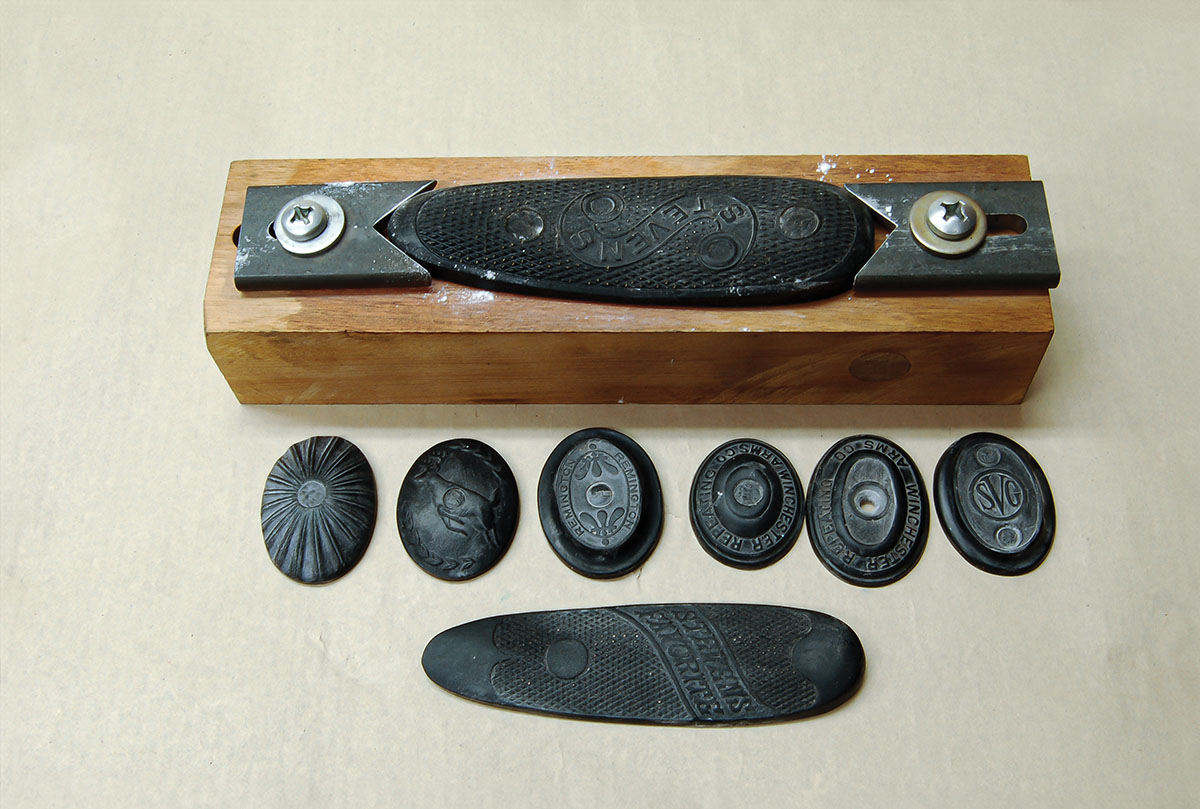
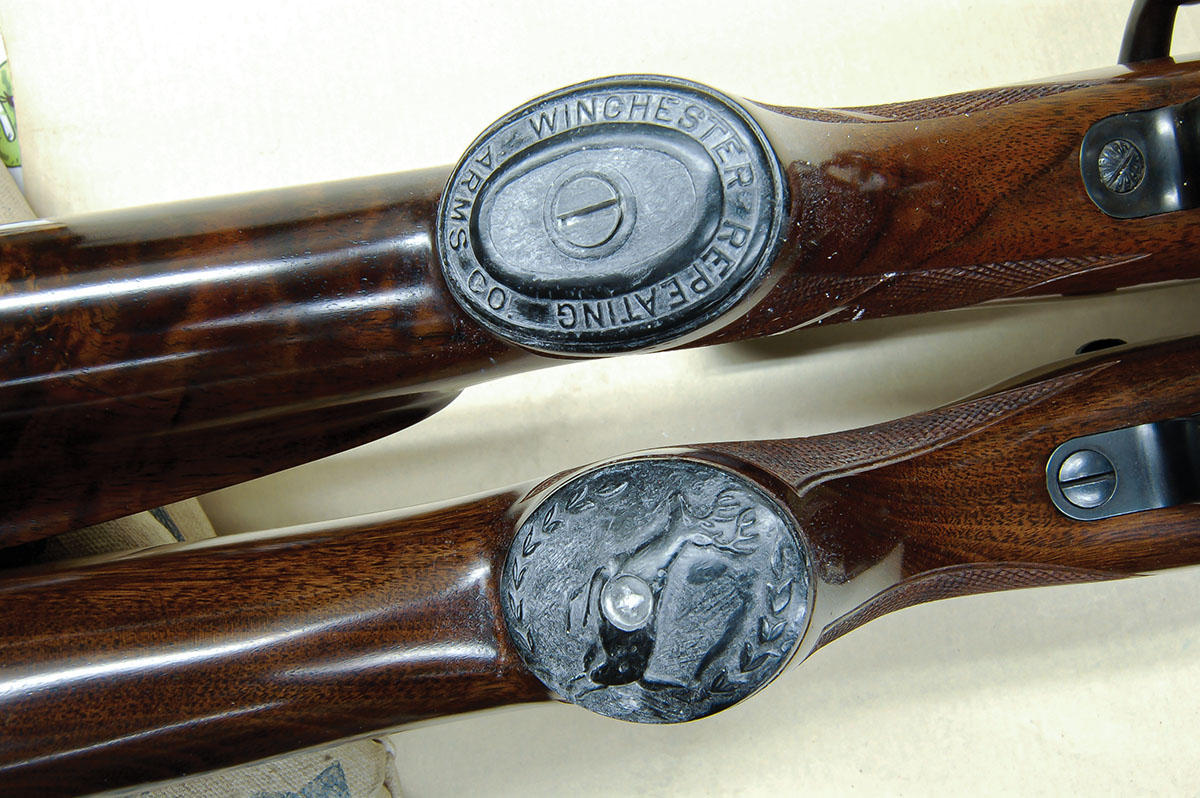
    Remington’s “leaping deer” and “flying goose” grip caps are common, as are the two sizes of “Winchester Repeating Arms Co.” caps. Remington also has two sizes of a fancy grip cap and Savage had a couple for Model 99s. Mauser had at least three. European gunmakers had the greatest variety, making caps and plates from compressed horn or carving them from the same material. Most of these from the 1900-1950 period are unappreciated art in design, form and company logos.

    Early caps and plates were made from a material called gutta-percha, a plastic-like substance that came from the latex (sap) of certain Malaysian trees. Later, hard rubber became popular, being made by vulcanizing natural rubber. Both of these products eventually became brittle and tended to break. Better material came along in the 1950s, but grip caps were often cast as thin shells (cheaper) and they still broke in cold weather. The grip cap I will make is impervious to everything but burning!

    After locating, the screw hole is drilled using a standard twist drill and countersink.
    After locating, the screw hole is drilled using a standard twist drill and countersink.
    As mentioned earlier, a pattern is needed. Since it must be returned to its rifle, it is attached to a wood dowel “handle” using a wood screw, as shown in the photo. A mould is now made using common child’s modeling clay. The package shown will last a lifetime.

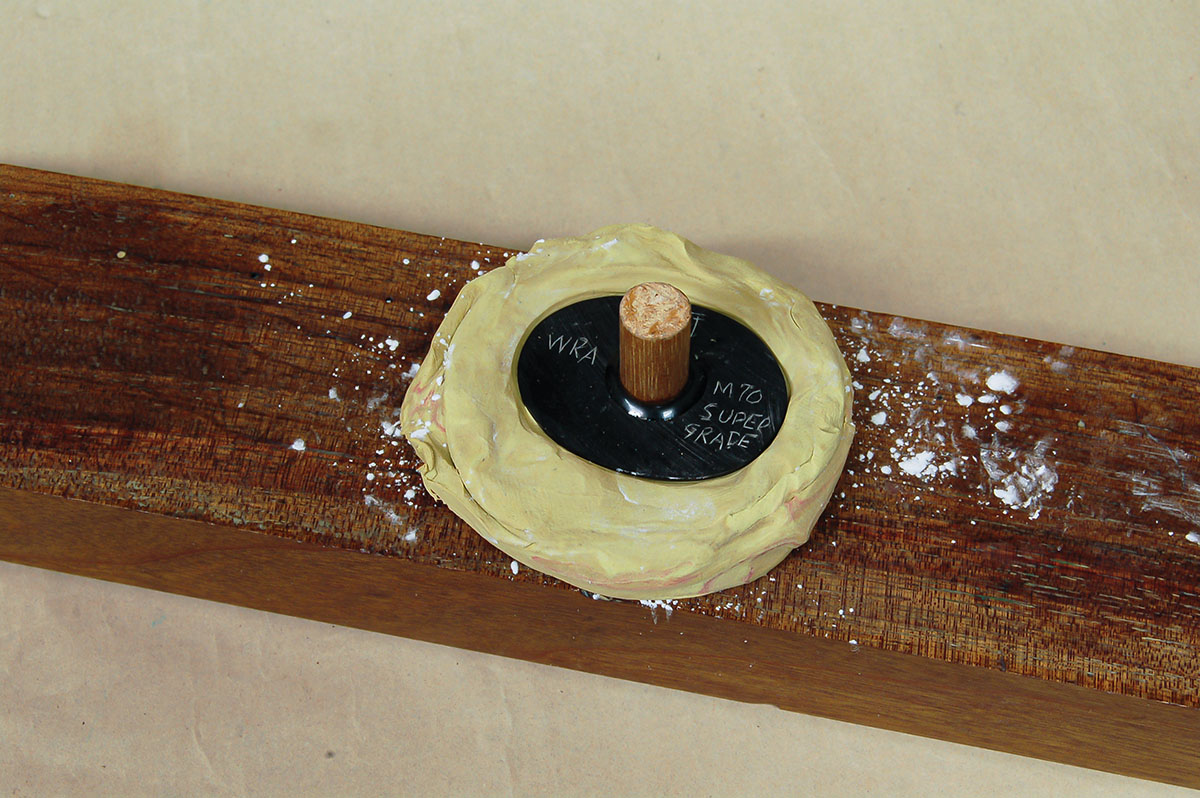
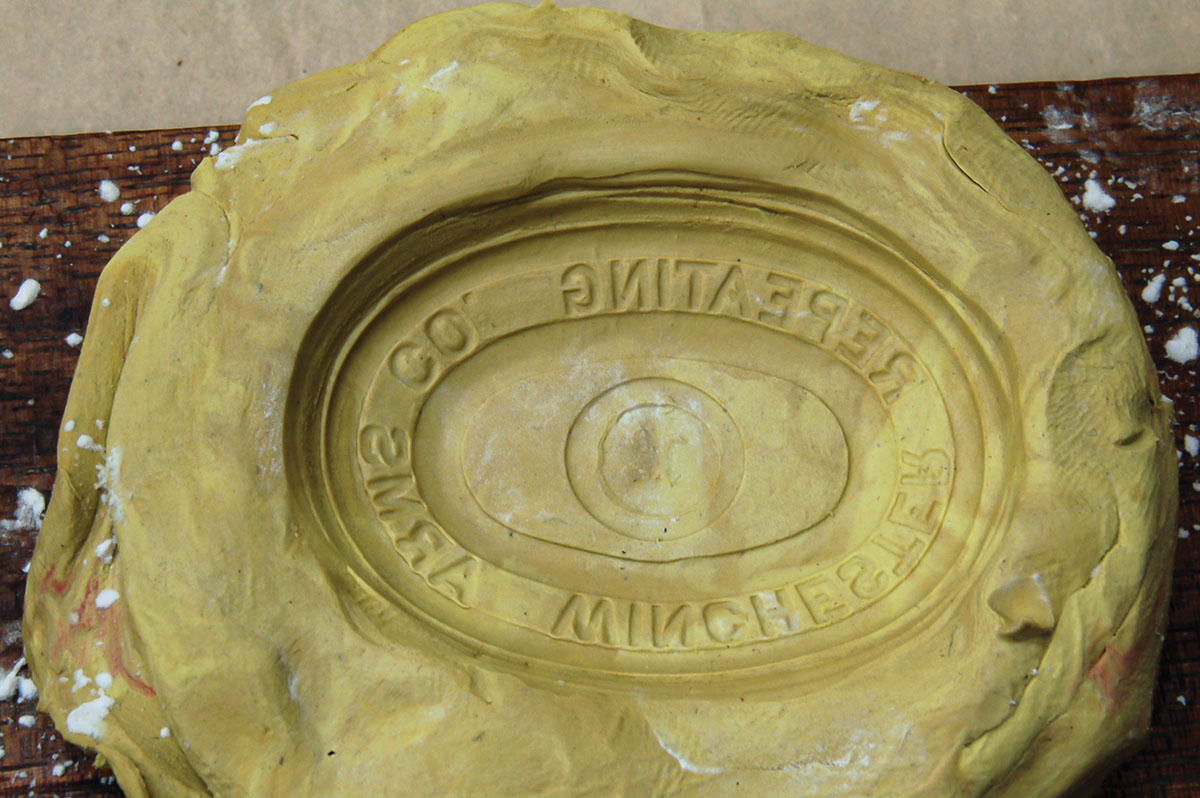
    Making the mould is basically common sense – just push the pattern into clay. However, it does require a certain technique, which is probably due to the composition of the clay. The following procedure has been perfected over the years and will provide perfect details in the mould every time.

    First off, the quantity of clay needs to be such that there is at least a half-inch under the pattern when pressed to full depth, with the same around the edges. The surface under the clay must be flat and level. Non-level obviously means the mould won’t fill evenly, thus ruining the casting.

    The number of fancy grip caps is limitless and buttplates are possible too, when held in a large drill jig.
    The number of fancy grip caps is limitless and buttplates are possible too, when held in a large drill jig.

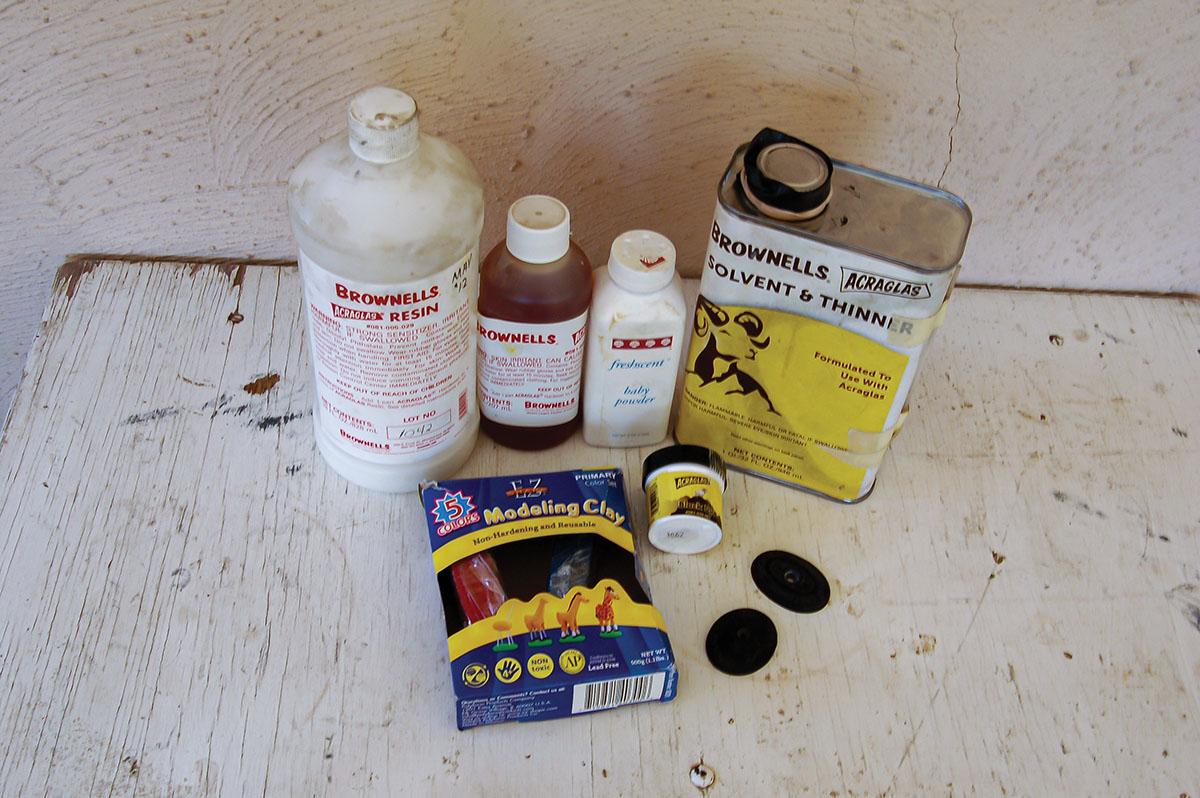
    Next, the clay used here tends to develop hard spots if not used for a few months. Simply kneading it like bread dough for a few minutes is required. Now, form the clay into proper size and thickness. Clay tends to be “sticky” so a coating of baby powder is applied to the surface. How much is difficult to say. Try enough to be easily seen, then smooth it out with a finger. It helps significantly if the clay temperature is under 70 degrees Fahrenheit. Making a couple of practice cavities is far better than words. Sometimes coating the pattern with an almost imperceptible coat of light oil using a soft toothbrush is required. Placing the clay in the fridge for a few minutes before impressing the pattern also helps.

    Here are homemade grip cap reproductions on a Winchester M52C (top) and custom-stocked Remington M722 (below).
    Here are homemade grip cap reproductions on a Winchester M52C (top) and custom-stocked Remington M722 (below).
    The pattern is now slowly pressed into the clay at least .050 inch below its top surface. This will allow for the settling of the epoxy. Remove the pattern by pulling straight up on the wood dowel. If reasonable effort doesn’t work, put the whole thing in the refrigerator for a while. The pattern will then pop out. The mould should have perfect detail, if not make another. The cap produced in the first mould will have a wood dowel epoxied to its back and become a pattern for making limitless copies in the future. Accumulating such patterns can become a hobby for anyone who does stock work. My collection amounts to some 40 grip caps and 12 buttplates.

    Pouring epoxy is next and it too has rules. The epoxy bedding compound I have used for more than 50 years is Brownells Acraglas, so the instructions apply to it, but it should be similar for any epoxy. Begin by mixing the resin and hardener. Stir slowly. If treated like a 5-gallon bucket of barn paint, air bubbles will form in the mix. These will cling to the edges of the mould and ruin the casting. Brownells sells a black dye that is added now along with an Acraglas thinner that makes the epoxy the consistency of water. If it is poured into the mould slowly, air bubbles are eliminated and a perfect casting results.

    An interesting rounded and ribbed cap is shown here used on a new stock in progress. The white powder shows the detail. The pattern came from German drilling.
    An interesting rounded and ribbed cap is shown here used on a new stock in progress. The white powder shows the detail. The pattern came from German drilling.

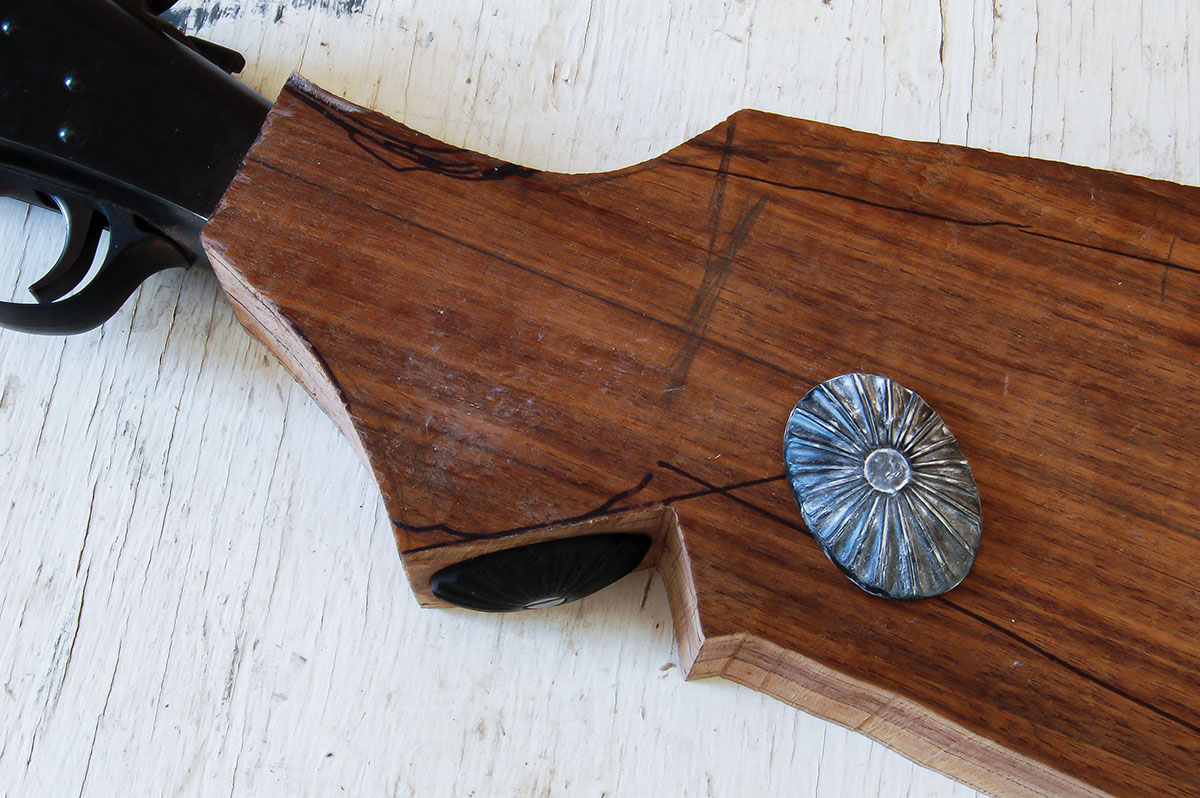
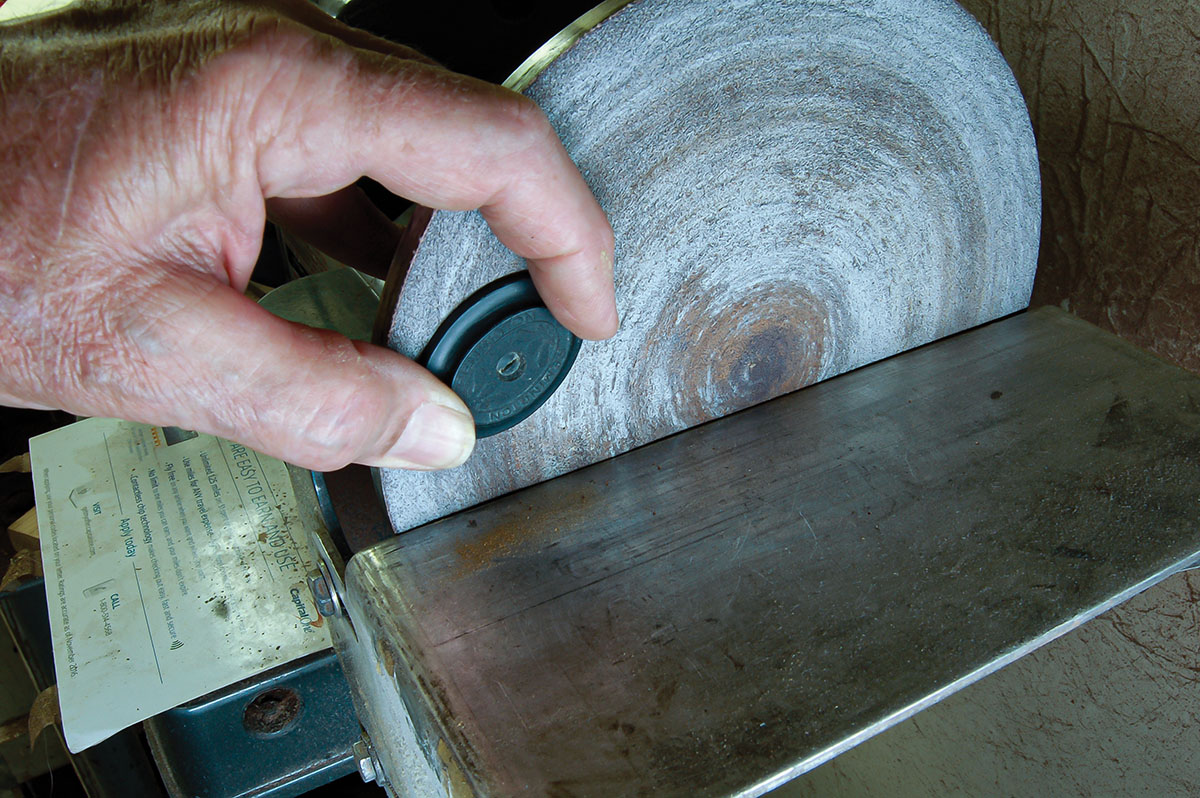
    After the epoxy hardens, getting the clay off is a bit tedious. It must be rubbed off with the fingers. When clean, the rear of the new cap is flattened by rubbing on a sanding disc, and no, the power is not on!

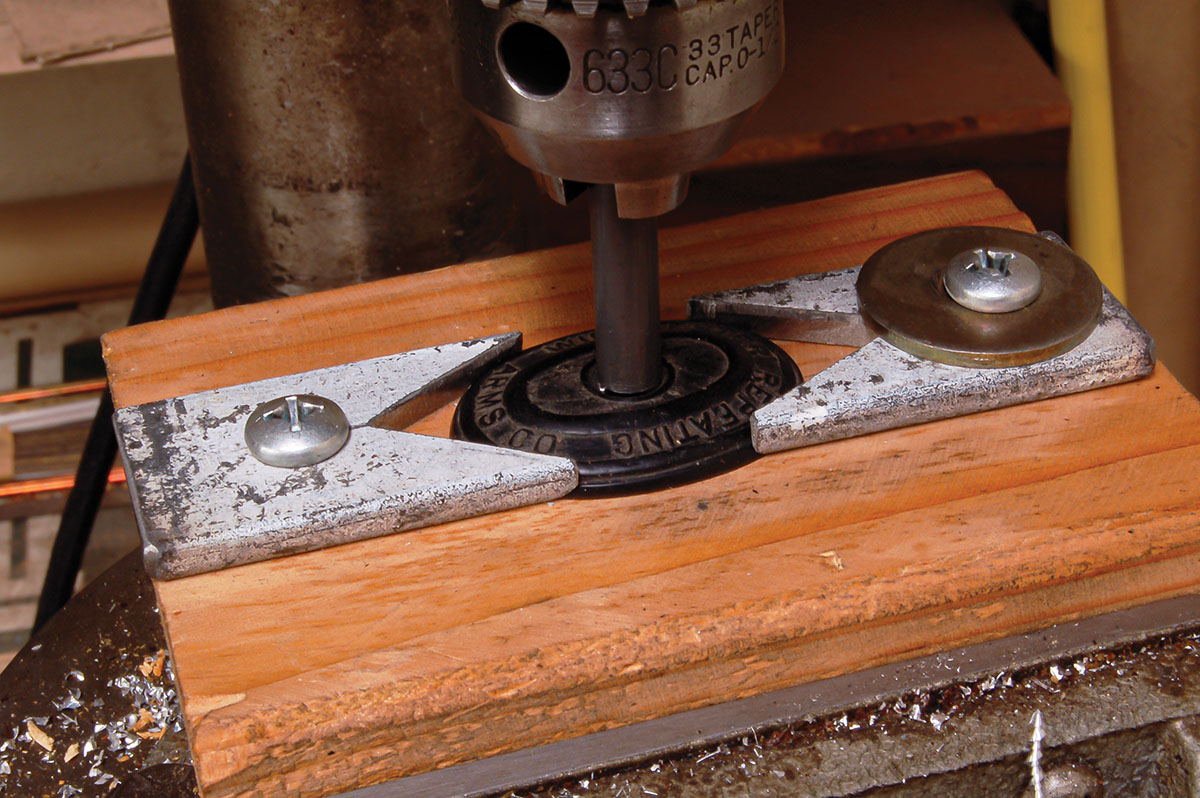
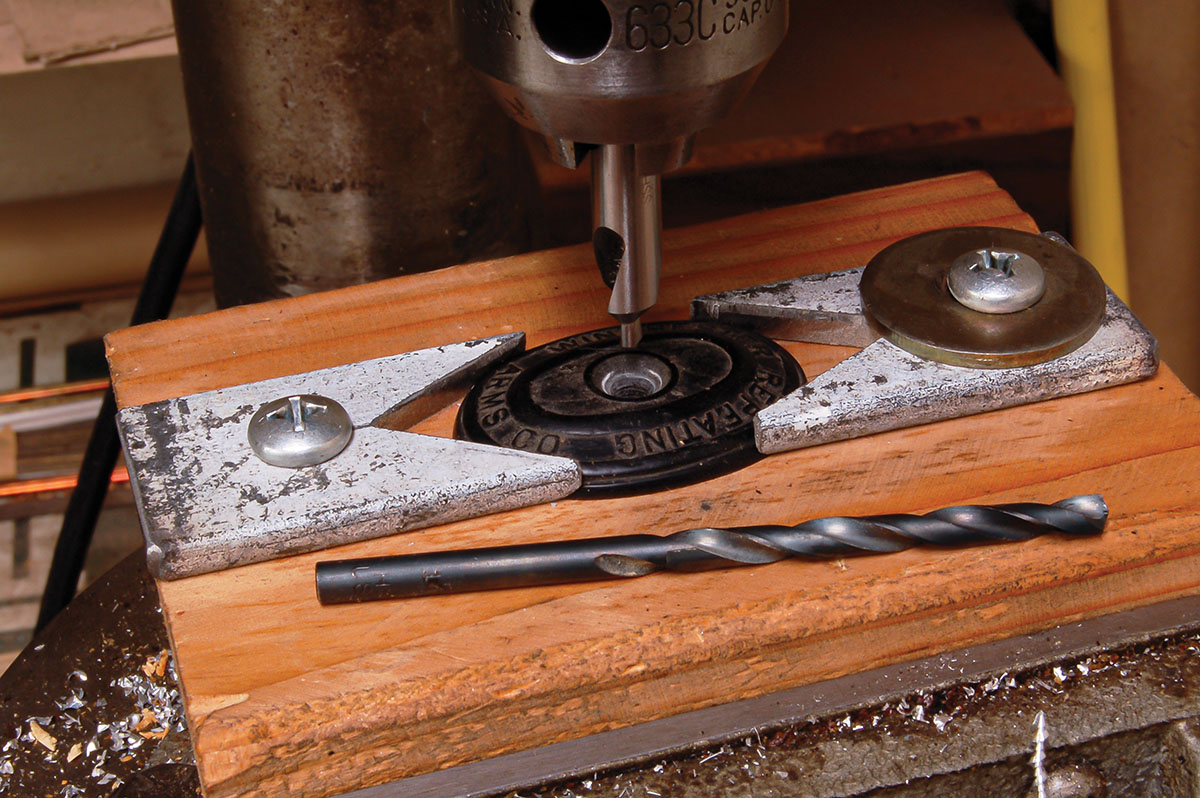
    Drilling the screw hole in a cap to be used on a stock is also tedious without the jig shown in the photos. It is self-explanatory and was made in about 15 minutes. The base is a piece of 2x4 lumber. The short piece of steel in the drill press chuck is the same diameter as the head of the mounting screw. Perfect alignment of the hole on the surface of the grip cap is now simple and quickly made using a twist drill and countersink.

    Buttplates require a longer drill jig, which is also shown in a photo. Dozens of buttplates have been made for Stevens and Savage guns over the years. The study and reproduction of these seemingly insignificant decorative items hopefully causes an appreciation for the artistic expression once considered a necessary part of our culture, but now nearly gone.


    Wolfe Publishing Group